Welcome to the Tiny Tomato Blog
|
|
|
|
I was going to wait until after 30 days to prune my tomatoes, but it seemed like some of the bigger plants were crowding out the smaller ones and some were not getting enough light. So I decided to prune early. As I type this, it is Thursday. I pruned on Monday of this same week. So, how did it go? 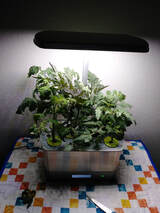 So here they are. The instructions I found said to use a pair of "kitchen shears." The scissors in the video look like the cheapest scissors you can buy in the sewing section of Wal Mart, so that's what I used. I had never used them for plants before, so I didn't wash them or anything. If I had trimmed some other plants first, I would have washed them or sterilized them first. I just started trimming. Basically, my thought was just to give the smaller plants some chance of getting some more light 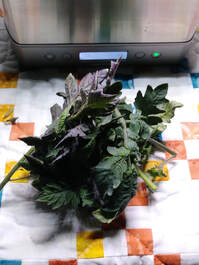 OH LORD WHAT HAVE I DONE OH LORD WHAT HAVE I DONE So here's the bunch of tomato plant branches. I shouldn't have set them down on the quilt, there's some green stuff (chlorophyll?) on there now. Aerogarden's "official" video on pruning says not to be scared of pruning because plants "love it." I'm sure they do. I'm sure it's fun for them to be hacked to bits by weird humans. 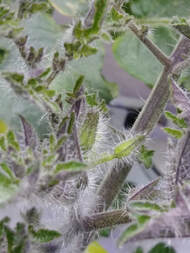 PEEKABOO I SEE YOU PEEKABOO I SEE YOU While I was pruning, I noticed the buds! Oh ****, did I prune any buds off? Too late. I really didn't notice them. I don't think I did. Have I shocked the plants to the point that these buds will now never open? Oh Lord, the cheery lady in the Aerogarden video has led me down the "garden path!" I'm hyperventilating a bit at this point. 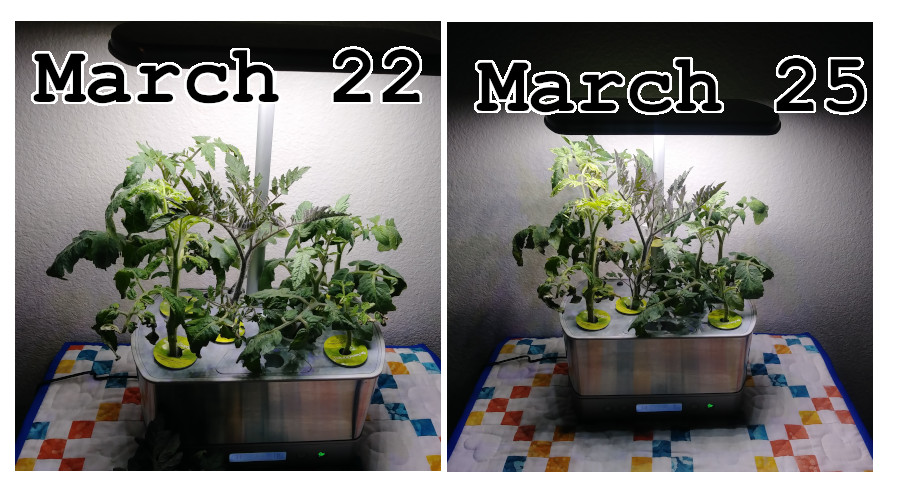 I'M SORRY I'M SORRY I'M SORRY I'M SORRY So here's what it looks like on Monday after I pruned compared to today. I'm not sure it's better.. I'm hoping I'm imagining things and it doesn't actually look worse.
I'll put a link to the Aerogarden pruning video I watched in the resources section. This might be the last blog for a while if these things die. Saint Fiacre, pray for me. I'm gonna need it.
0 Comments
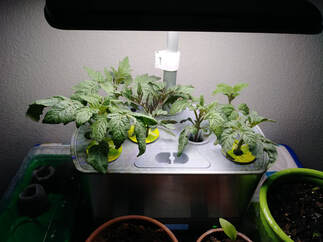
I hadn't planned on making today the day I did a major change to my Aerogarden. In fact, I had planned on not doing much at all until it told me to add water. I wanted to see how long it took to warn me about a low water situation. Well, that went out the window by last Friday. The water seemed to be going down a lot, so I topped it off anyway. I do have to say, though, that today I found a video on YouTube about the low water situation (link provided in resources section) and the man in the video said that it took his Aerogarden about three days to warn him, and the water level was about halfway down. That told me what I needed to know anyway. When I walked out into the living room to check on the tomatoes, I hadn't planned on changing the water just yet. I was close to the four week mark, but was waiting because I didn't want to waste nutrients. But looking at my Aerogarden this morning, I kind of felt like today was the day. 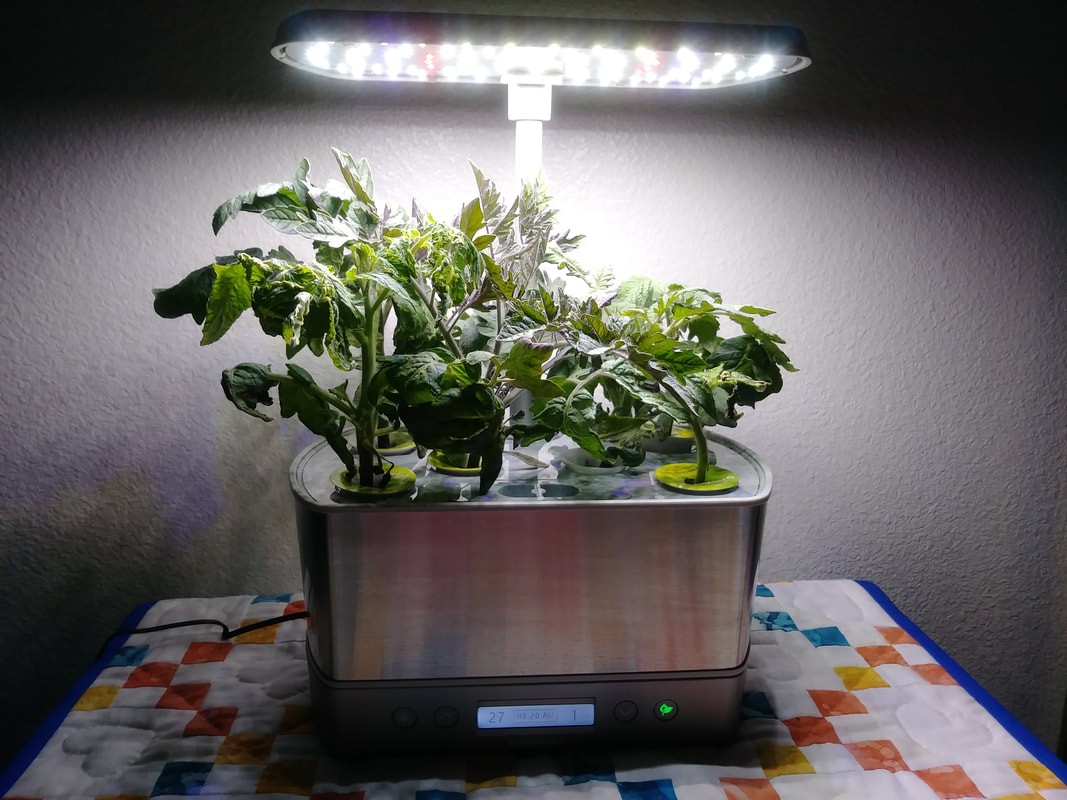 HI THERE Hey there, looking good this morning! 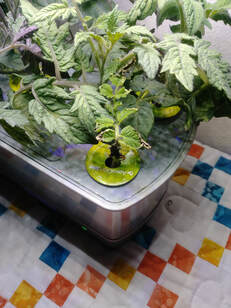 This little guy was in the back getting crowded out. I switched him out for another one that was in front to try and get him some more light. Upon reflection, it was not prudent to use all the slots. But, Aerogarden does not provide just plain covers for the seed holes with the starter kit and I didn't know how well taping cardboard would have done to prevent light from getting in through the hole. You have to make sure any unused spots are covered so the light doesn't encourage algae from forming in the water. 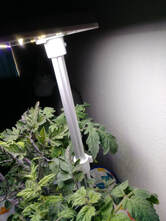 First step: Raise the light all the way up to give yourself some room to work. This is going to become less and less relevant as time goes on. The light doesn't really feel that sturdy. It really isn't that bad, but this plastic telescoping thing is probably one of the weak points of this system if you are not a gentle person. 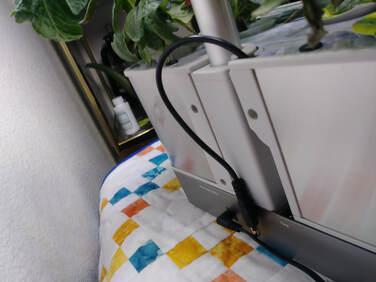 On this model, you have to unplug the pump from the bowl thing. On the videos I've seen on YouTube, they just lift the bowl part right off without showing unplugging anything. I don't know if that is because it is a different or older model that has a different way for the pump to plug in or because they didn't show it. Remember to try and do this right after the pump stops its 5 minute run so you have an hour to do all this before the pump wants to pump again. As soon as I plugged mine back in after, the pump immediately started up. Then it stopped pretty soon after. I used the menu button to give the pump a little test just then to be safe and it seemed to be OK. 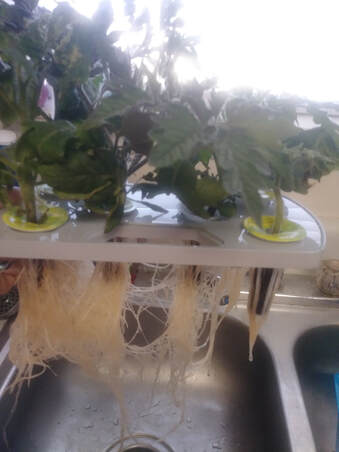 I picked up the whole bowl assembly with the seed pods and all and set it by the sink. I had my plastic basket ready to set the seed tray on. Here is the root system. I guess that's looking pretty good? I don't really know much about this sort of thing. I only ever grew plants in the ground before, so I don't know what kind of roots things are supposed to have at whatever point. There is clearly a lot more going on in the left hand section. It is interesting to note that the biggest one on the left used to be on the right side before I switched some around before. I think the roots are too enmeshed to do any switching around anymore, unless I trim a whole lot. Which I'm not going to do. 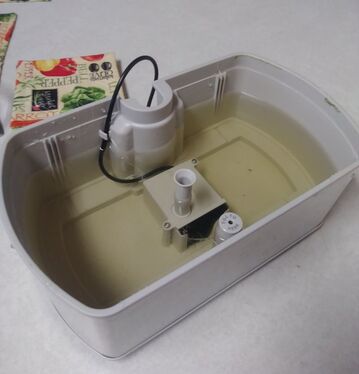 This is what the water looked like. I'm not sure if the water is that color merely from the nutrients added to it or not. The nutrient solution definitely is dark in color. I poured this water out and gently cleaned the inside with just plain water. There was a bit of something, well, not quite...slimy...going on with the bottom of the bowl thing. I wiped that with a paper towel and, it seems, problem solved. I didn't use any soaps or detergents, as I thought that keeping it simple was probably best. 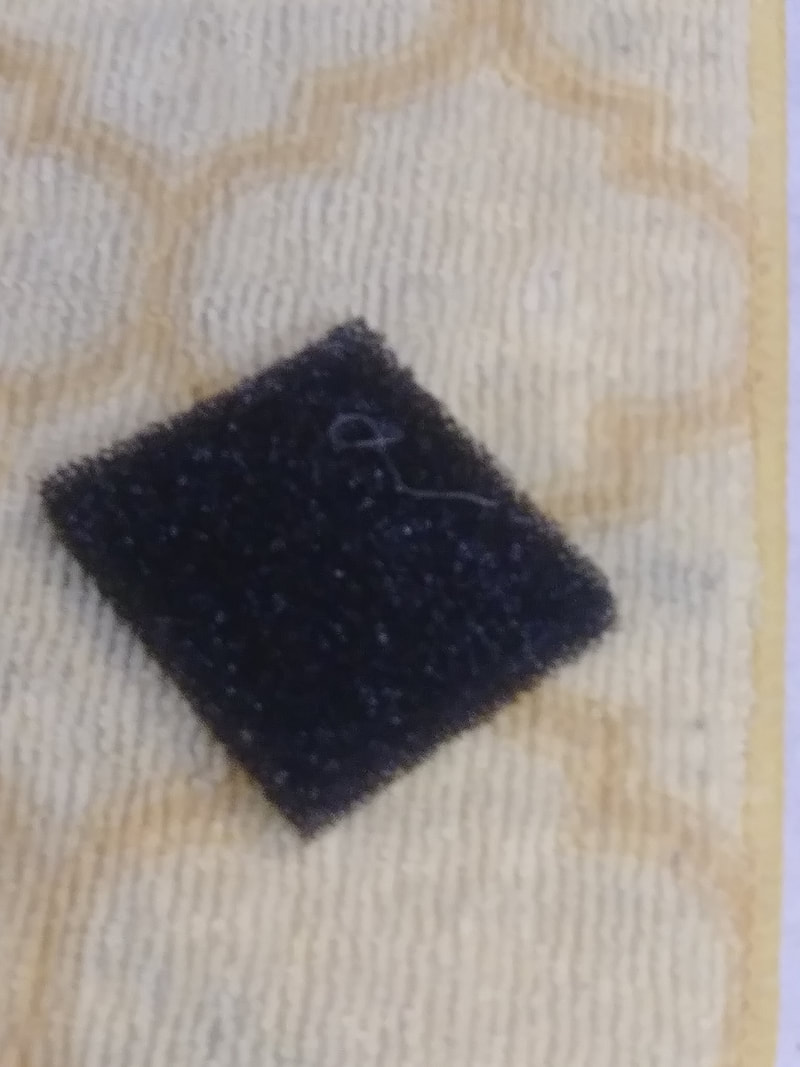 I took out the black filter from the front of pump as it is clearly removable and found some roots trying to grow into it. As I rinsed it out and gently squeezed it, I kept finding more root pieces every time I thought I had gotten them all. I got them all out, I think.  The bowl thing before the final wipe down. There are a few stray roots and things. But it doesn't look too bad really. See the part I've circled? That's a little clip that holds the pump cord in place. It had some gunk around it, so I wiped all around that with a paper towel. It had some roots trying to grow around it, too. It stands to reason that you should keep an eye on any little areas that could be trouble spots later on if you don't clean them.  There was some gunk building up around the rim. I wiped that down, as well. There was some building up in the ridges on the seed tray, too. I wiped that off as best I could with all the tomato plants in the way. The seed tray is definitely going to need a good cleaning once these tomatoes are done and I get ready to plant something else. I think you can put the bowl and the seed tray in the dishwasher to disinfect it, however. I guess this is the algae the instructions warned me about? 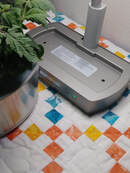 Here is the base without the bowl in. I started to carry the thing back to the base full of water but thought better of it. I left it half full and then carried it back. Next time I'll just not put water in yet at all. Easier and safer to carry that way. I can always fill it with my watering can when I get it back on home base. So that's what I did, I filled it the rest of the way when I had gotten everything situated again. 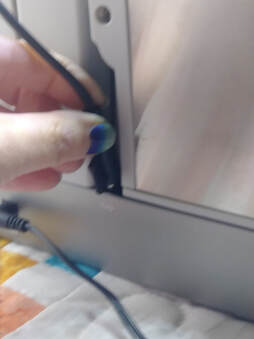 Put it on the base, then plug the pump back in. There is a little flange on the pump plug to help you do this. On this model, you position the plug over where you plug it in, and then push down. By the way, getting it out before removing the bowl I almost thought that the plug wasn't supposed to be removed once you plugged it in when setting it up, because it felt like it was in there for good. But there was absolutely no way to get the bowl out without unplugging it. 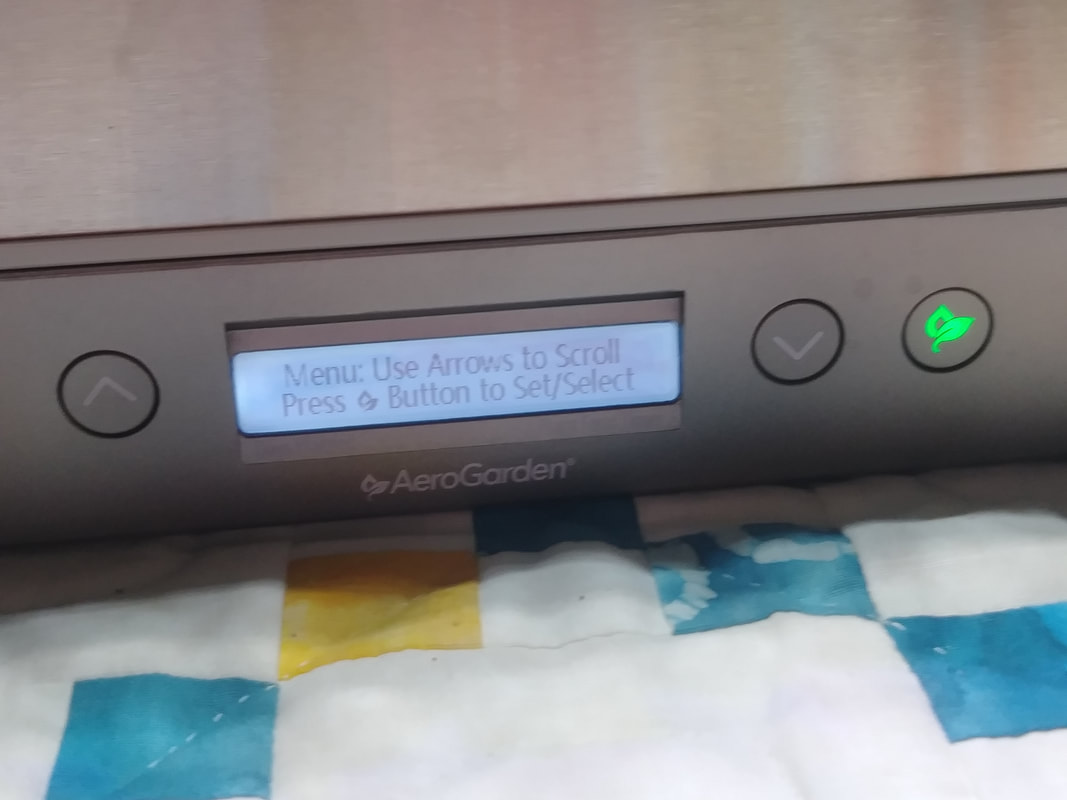 About the nutrients: Since I still had time left on the plant food timer (it's the number that is to the right of the time on the display panel when it's in regular mode) I had to reset the timer. You press that glowing green leaf button to get to this menu. You press it again to get to the options and use the up and down arrows to move the menu, then press the leaf button again to select one  This is the menu option you want if you want to reset the plant food timer. Since I was adding nutrients today, I needed to reset it to alert me in two weeks to add more. Once you see the "Change Days" option, just press the leaf button again. 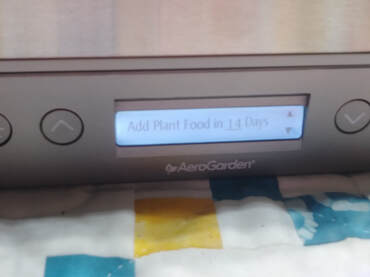 The instructions for this size Aerogarden say add 8mL every 14 days. Navigate to this option, use the arrow keys to select how many days you want, and press the leaf button again. 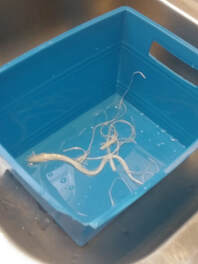 Oh, there's the basket I used to set the seed tray while I cleaned the bowl. One video I watched showed a man just laying his seed tray down with the plants on their sides. He just had lettuce in his. I thought the tomato stalks might break if I laid them down like that. I did trim the roots just a bit because I was worried they would grow into the pump mechanism, as this was something that I had already read warnings about. Too little? Too much? Just right? Only time will tell. All the plants seem safe and happy again. I didn't think to take another picture. Just scroll back up to the top, I guess, because that's what it looks like again.
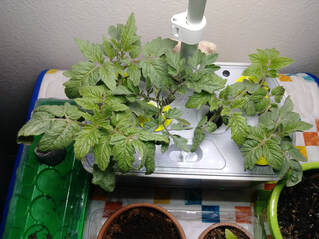
And that's it for the whole process. All in all, kind of anticlimactic. I was a bit worried I was going to break the tomatoes or something. But all seems well. See you next, week, which is 4-5 weeks (I guess technically tomorrow is 4 weeks because it is day 28) so it'll be about time to prune for the first time. That plant on the left certainly looks about ready. Ciao! I've added a few things to the Resources section. I can't find some of the info I wanted to include. Once I find that again, I'll update that section again. That's all.
"Tomato Thursday" Doesn't quite roll off the tongue, does it?
So, last night I decided to lift the LED lights up just a bit. Some of the plants are really taking off. I switched around two plants. I took the sort of weak one that was on the left side nearest me (the camera, I guess so to speak) and switched it with the one that was just to the left and a little bit back of the access hole. I wondered if that big one was doing so well because it was near the pump. I don't know yet if it will make a difference. 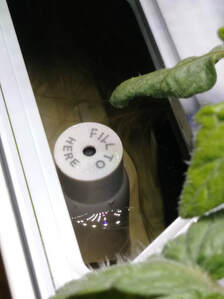 I think you can also see how low the water is getting. I had just put water in the day before. I think I remember my grandmother saying that tomatoes are really thirsty plants. That would make sense, if you think about how much water are in the tomato fruits when they are ripe. Instead of topping it off right now, I'm going to wait and see how it lets me know when the water is down. After that, I will just top it off all the time. I just want to find out how it lets you know when to add water. 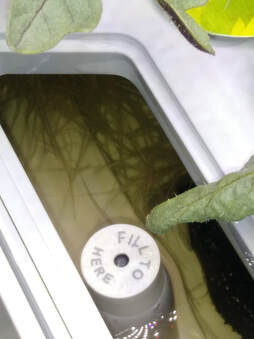 I tried to get a picture of all the roots in there. Wow! I have trimmed the roots just a bit so far. I think the next major undertaking will be to change out the water. Perhaps I will do that when it tells me to top off the water level. The water doesn't really look as green as it appears in the picture. That's just some kind of lighting thing due to the flash and the fact that it's just the camera on my phone which is not spectacular. 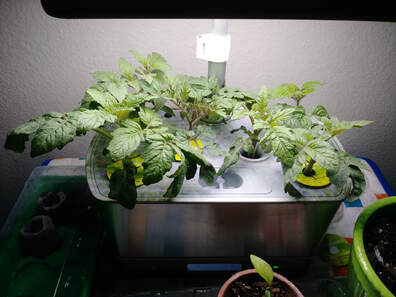 I took a picture again this morning. That one in the lower left really looks like it's taking over. Also, last night I trimmed a little bit of some of the leaves that were looking a bit poorly. So, the next major projects are going to be changing out the water and pruning for the first time. I'm also a little bit nervous about pollinating these things. You can buy this "Be the Bee" thing from the Aerogarden website, but I think its just an electric toothbrush without the bristles? I've seen in some other places that you can use an electric toothbrush to pollinate these things.
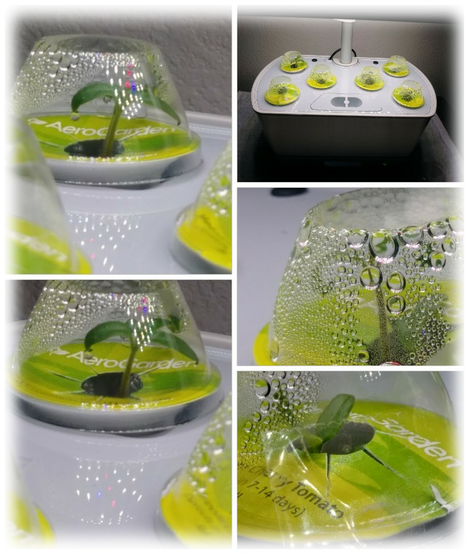
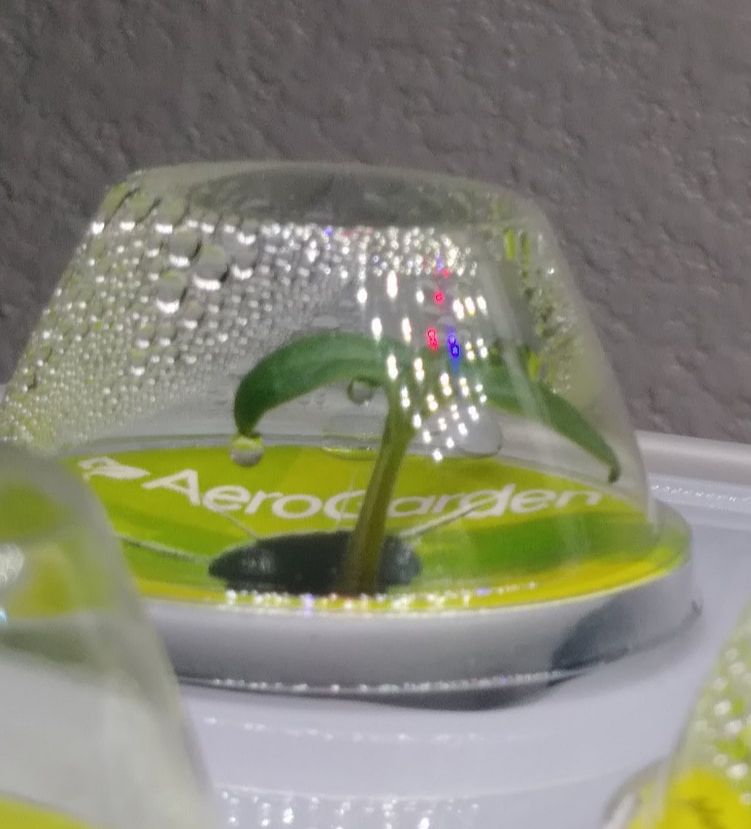
And, I haven't forgotten about having a resource section. It just has been very overwhelming thinking about making one because there's so much information to go through and I want to make sure I give you guys good info. Perhaps I can do that later tonight, and I'll update the website and do a bonus blog post. Take care and eat some tomatoes today! 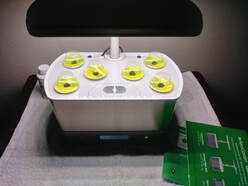 The day it all started. February 19, 2021. Well, it actually started a week or so before, when my fiancé ordered me an Aerogarden as a Valentine's Day present. He knows I didn't inherit my grandfather's green thumb, and he had heard that this was a foolproof way of keeping plants alive, so this was a welcome present. Within minutes, my little seed pods were tucked away in their shiny metal-like guardian, bathing in their vitamin bath, safely away from my ministrations. Well, mostly, I have some things to do. But the directions promised that the Aerogarden would provide the plants the proper light, and that the thing would remind me when to put the plant food in and tell me if the water got too low. 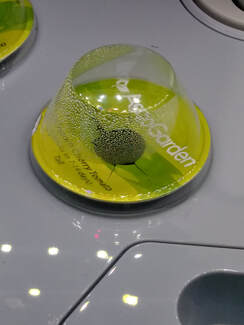 Feb 21, moisture starting to condense on the "seed dome." The domes are supposed to be "loosely" put on top of the seed pod things, but I found out that you have to make sure they're not too loose. If they're too loose, proper moisture won't condense and the plant will have a harder time. Thank goodness I saw a video about this early on, I knew to tape one of my seed domes down so a proper little greenhouse could develop. No sprouts yet on this day. 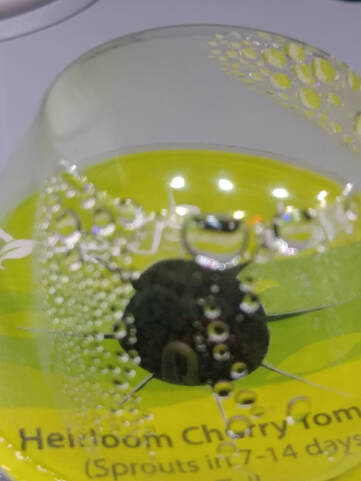 FEBRUARY 24, A SEEDLING!!!!!! Well, that didn't take too long. 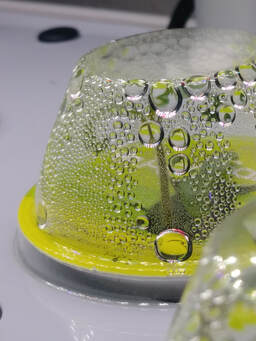 February 26. Seedlings really took off. Plenty of moisture. 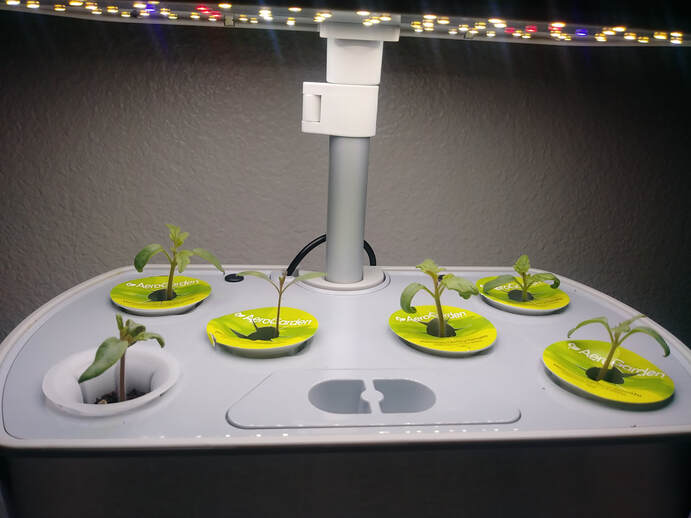 March 2, domes off, plants seem to be generally happy. You're supposed to take the domes off before the seedlings start actually touching the domes. The label on one came off with the dome, it was loose anyway. Oh well, I don't think it matters. By the way, the one without the label was the one I was worried about because I had to tape down the dome because it wasn't "greenhousing" properly at first. It seems to be doing just fine. I saved the domes and the one label. I know the domes can be reused, the label I'm not so sure about. 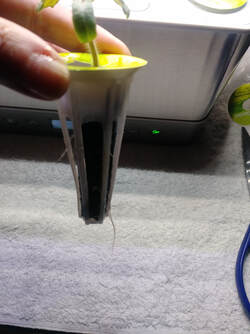 Also March 2. I guess this is plenty of roots? The plant seems to have no complaints about anything. A poster in a houseplant forum I belong to on Gab said that I need to make sure and trim the roots so they don't get caught in the water pump and clog it up. I'll have to keep a watch on that. 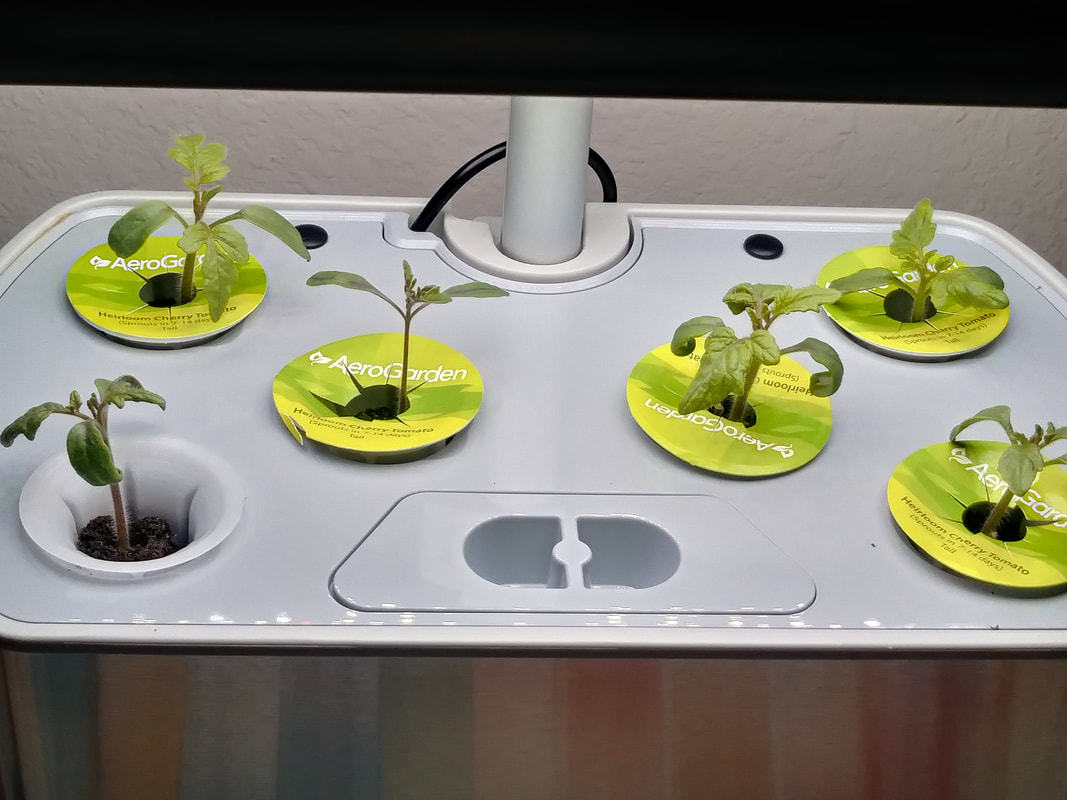 March 3. Does it look any different that March 2? I'm not sure. 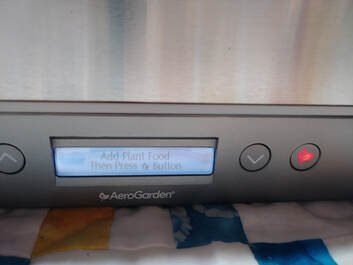 Today, March 5. The plant food light was on this morning. Normally, you just take off the little cover over the small hole in the thing and pour the liquid food in the spot that they provide for you to do it. Because I'm a complicated person, and because I had been peeking and and seeing a lot of roots, I decided I had to make things more complicated than that. 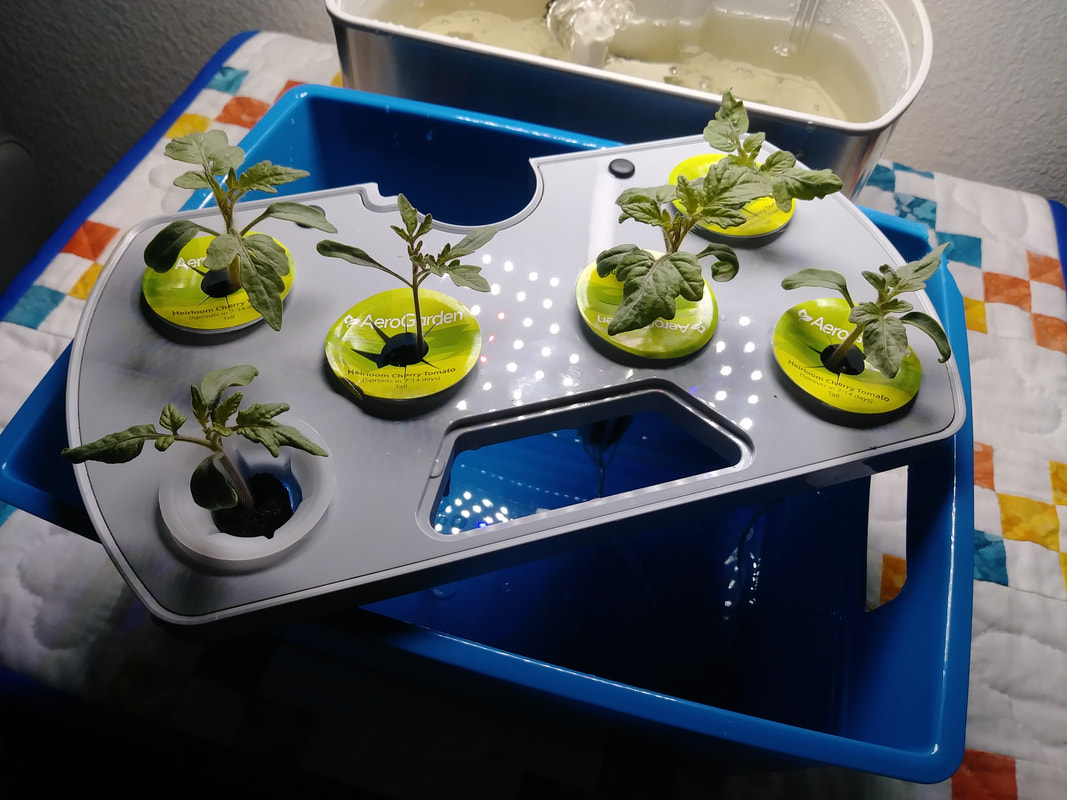 I took out the seedling tray and gave it a place to rest. This was also a test run for the one month mark where I am going to have to switch out the water and I wanted to have a plan for what I was going to do with the seedlings while I did that. I also took this opportunity to check the roots and trim a little a few of them. This Dollar Tree basket was **almost** the right size. It worked for now. I'm thinking making a frame that I can set in the sink and let the tomatoes chill there for a little bit while I change out the water. I'm not sure yet. 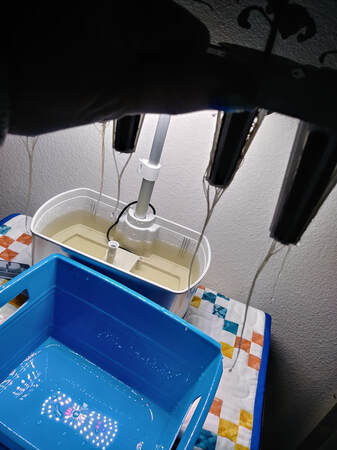 The roots! They don't look like too awful much here, but when they're in the water they spread out considerably. One of the longest ones is right next to the pump. I wonder if it gets better water flow right there and grows better? I don't know. I'll try and remember to see if the ones further away from the pump have root systems that take longer to develop. I trimmed them just a tiny bit, I'm a little scared because of the aforementioned brown thumb. I'm not so concerned with the roots, really, it's pruning the top I'm worried about. That probably won't have to be done for a good long time. 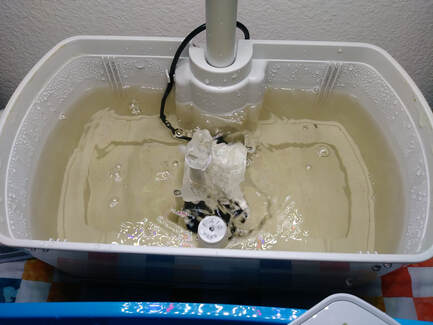 The pump hard at work. Sort of. It's not really that massive of a pump. Pretty quiet, really. Looks like a little dirt from the seed pods got in the water and is hanging out in the upper right area. I guess the water is that color from the plant food. I also topped off the water as it was just slightly down. I know this thing will tell me if the water gets too low, but that's another tip someone from the houseplant group said: Try to keep the water topped up more frequently, don't wait until it tells you to put water in.  All happy now, the plant food light is green again. Sorry the picture is a bit blurry. I was done with this whole process at this point and wanted to eat my breakfast that I had forgotten about while I was preoccupied with the tomatoes. They got fed before I was! 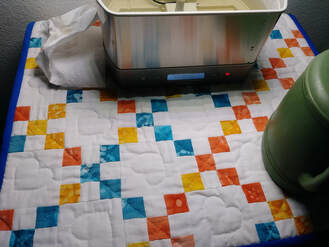 If you've followed me over from any of my crafty pages, then you might have read about my Jelly Bean Irish Chain Quilt. I figured it would make a nice cover for my Aerogarden table. It's washable, I don't think the Aerogarden is going to make too much mess, and it looks so nice under the lights! And it gives my quilt pride of place in the parlor. Whew!!!!That was a lot. That's only because I let so much time go by before I posted anything. I'll try not to let that happen again! I normally blog on Fridays on my main blog, I put out a short podcast on Anchor on Wednesdays, so I think I will make "Tomato Day" Thursday. Links for all this and resources on tips for growing and also money saving Aerogardening ideas will appear in the "Resources" section of this blog once I've got some together and can sit down and format it all. Ciao for now!
 hi there, tiny tomato hi there, tiny tomato Over the next couple of weeks I'm going to be moving my Aerogarden pictures and tips to this blog. I've already discovered some ways to reduce the cost of Aerogardening. Please keep coming back to see what changes!
|
AuthorJust a person growing stuff in an Aerogarden Archives
October 2021
Categories |
 RSS Feed
